Deploy an application for Azure Container Registry (Part 2:
Build and store images by using Azure Container Registry )
What is Container Registry?
- Azure service that you can use to create your own private Docker registries.
- Similar to Docker Hub but offers a few unique benefits: Container Registry runs in Azure, Container Registry is highly scalable, providing enhanced throughput for Docker pulls that can span many nodes concurrently.
Create an ACR with Azure Portal
To get started, we will access the Azure portal, you need to click on “create new resource”:

We select Containers in the left of the window after we choose Container Registry. We click on Create to create a new container registry.

In the next screen, you need to configure your registry, you select the subscription, after, the name of the registry, next, the location, the SKU — for this article I choose the Basic SKU, we check Enabled for availability zones and we click on Review + create, and in the end you click on “create’’ even the validation passed.
We have more than a tab, like Networking tab, Encryption and Tags.

If you select Basic or Standard SKU, in the Networking tab, you will not be able to configure Connectivity to connect to this registry either publicly, via public IP addresses, or privately, using a private endpoint. Only Premium SKU allow it.
Even for Encryption tab, Azure Container Registry service encryption protects the data by encrypting the images and other artifacts when they’re pushed to your registry and automatically decrypts when you pull them. But Customer-Managed Key is only available for Premium SKU.
Create an ACR with Azure CLI
1. If you don’t have any resource group you need to create a resource group by using the az group create command.
az group create --name <resource-groupe-name> --location <location>2. Next, we will create an Azure Container Registry instance in your resource group by using the az acr create command.
az acr create --resource-group <resource_group_name> --name <registry_name> --sku Basic --admin-enabled trueIf we want to connect to login to the container registry we habe to be administrator so we need to add -admin-enabled true that indicates whether the admin user is enabled,
3. Even we are administrator to the container registry, we will login to ACR created earlier by using the az acr login command.
az acr login --name <registry_name>The command returns a this message: “Login Succeeded” once completed.
Now, To use your application container image with Azure Container Registry, you have to tag the image with the login server address of your registry and to to do that we need to follow these steps:
a- Use the docker images command to view the list of your local image.
$ docker images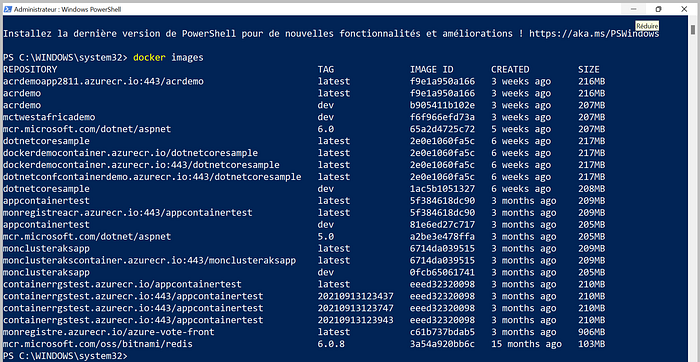
b- Get the login server address for the Azure Container Registry by using the az acr list command.
az acr list --resource-group <resource_group_name> --query "[].{acrLoginServer:loginServer}" --output tablec- Now, we need to tag the application image with login server address of your registry from the previous step. This will add an alias of the application image with a complete path to your registry.
docker tag yourtagtoadd<registry_login_server>/yourtagtoadd:01d- You can use docker images to verify you tag.
4- And use docker push command to push the application image to your container registry.
docker push <registry_login_server>/yourtagtoadd:015- Finally, you need to validate if the image is uploaded to your registry using this command line:
az acr repository list --name <registry_login_server> --output table